- Select Yes in response to the popup window.
- use default settings for all other options
There should be at most three warnings present: WSUS on site server, configuration for SQL Server memory usage, and SQL Server process memory allocation. These warnings can safely be ignored in this test environment.
Depending on the speed of the Hyper-V host and resources allocated to SRV1, installation can require approximately one hour. Select Close when installation is complete.
Set-ItemProperty -Path $AdminKey -Name "IsInstalled" -Value 1 Stop-Process -Name Explorer Download MDOP and install DaRT
This step requires a Visual Studio subscription or volume license agreement. For more information, see MDOP information experience.
- Download the Microsoft Desktop Optimization Pack 2015 to the Hyper-V host from Visual Studio Online or from the Microsoft Volume Licensing website (MVLS) site. Download the .ISO file (mu_microsoft_desktop_optimization_pack_2015_x86_x64_dvd_5975282.iso, 2.79 GB) to the C:\VHD directory on the Hyper-V host.
- Enter the following command at an elevated Windows PowerShell prompt on the Hyper-V host to mount the MDOP file on SRV1:
Set-VMDvdDrive -VMName SRV1 -Path c:\VHD\mu_microsoft_desktop_optimization_pack_2015_x86_x64_dvd_5975282.iso D:\DaRT\DaRT 10\Installers\en-us\x64\MSDaRT100.msi Copy-Item "C:\Program Files\Microsoft DaRT\v10\Toolsx64.cab" -Destination "C:\Program Files\Microsoft Deployment Toolkit\Templates\Distribution\Tools\x64" Copy-Item "C:\Program Files\Microsoft DaRT\v10\Toolsx86.cab" -Destination "C:\Program Files\Microsoft Deployment Toolkit\Templates\Distribution\Tools\x86" Prepare for Zero Touch installation
This section contains several procedures to support Zero Touch installation with Microsoft Configuration Manager.
Create a folder structure
- Enter the following commands at a Windows PowerShell prompt on SRV1:
New-Item -ItemType Directory -Path "C:\Sources\OSD\Boot" New-Item -ItemType Directory -Path "C:\Sources\OSD\OS" New-Item -ItemType Directory -Path "C:\Sources\OSD\Settings" New-Item -ItemType Directory -Path "C:\Sources\OSD\Branding" New-Item -ItemType Directory -Path "C:\Sources\OSD\MDT" New-Item -ItemType Directory -Path "C:\Logs" New-SmbShare -Name Sources$ -Path C:\Sources -ChangeAccess EVERYONE New-SmbShare -Name Logs$ -Path C:\Logs -ChangeAccess EVERYONE Enable MDT ConfigMgr integration
- On SRV1, select Start, enter configmgr , and then select Configure ConfigMgr Integration.
- Enter PS1 as the Site code, and then select Next.
- Verify The process completed successfully is displayed, and then select Finish.
Configure client settings
- On SRV1, select Start, enter configuration manager, right-click Configuration Manager Console, and then select Pin to Taskbar.
- Select Desktop, and then launch the Configuration Manager console from the taskbar.
- If the console notifies you that an update is available, select OK. It isn't necessary to install updates to complete this lab.
- In the console tree, open the Administration workspace (in the lower left corner) and select Client Settings.
- In the display pane, double-click Default Client Settings.
- Select Computer Agent, next to Organization name displayed in Software Center enter Contoso, and then select OK.
Configure the network access account
- in the Administration workspace, expand Site Configuration and select Sites.
- On the Home ribbon at the top of the console window, select Configure Site Components and then select Software Distribution.
- On the Network Access Account tab, choose Specify the account that accesses network locations.
- Select the yellow starburst and then select New Account.
- Select Browse and then under Enter the object name to select, enter CM_NAA and select OK.
- Next to Password and Confirm Password, enter pass@word1, and then select OK twice.
Configure a boundary group
- in the Administration workspace, expand Hierarchy Configuration, right-click Boundaries and then select Create Boundary.
- Next to Description, enter PS1, next to Type choose Active Directory Site, and then select Browse.
- Choose Default-First-Site-Name and then select OK twice.
- in the Administration workspace, right-click Boundary Groups and then select Create Boundary Group.
- Next to Name, enter PS1 Site Assignment and Content Location, select Add, select the Default-First-Site-Name boundary and then select OK.
- On the References tab in the Create Boundary Group window, select the Use this boundary group for site assignment checkbox.
- Select Add, select the \\SRV1.contoso.com checkbox, and then select OK twice.
Add the state migration point role
- in the Administration workspace, expand Site Configuration, select Sites, and then in on the Home ribbon at the top of the console select Add Site System Roles.
- In the Add site System Roles Wizard, select Next twice and then on the Specify roles for this server page, select the State migration point checkbox.
- Select Next, select the yellow starburst, enter C:\MigData for the Storage folder, and select OK.
- Select Next, and then verify under Boundary groups that PS1 Site Assignment and Content Location is displayed.
- Select Next twice and then select Close.
Enable PXE on the distribution point
Before enabling PXE in Configuration Manager, ensure that any previous installation of WDS does not cause conflicts. Configuration Manager will automatically configure the WDS service to manage PXE requests. To disable a previous installation, if it exists, enter the following commands at an elevated Windows PowerShell prompt on SRV1:
WDSUTIL.exe /Set-Server /AnswerClients:None - Determine the MAC address of the internal network adapter on SRV1. Enter the following command at an elevated Windows PowerShell prompt on SRV1:
(Get-NetAdapter "Ethernet").MacAddress Note If the internal network adapter, assigned an IP address of 192.168.0.2, isn't named "Ethernet" then replace the name "Ethernet" in the previous command with the name of this network adapter. You can review the names of network adapters and the IP addresses assigned to them by typing ipconfig.
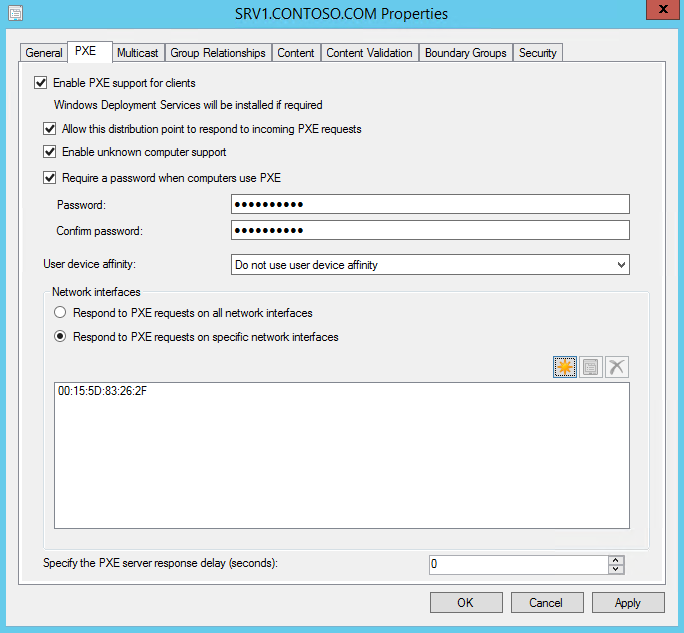
- Enable PXE support for clients. Select Yes in the popup that appears.
- Allow this distribution point to respond to incoming PXE requests
- Enable unknown computer support. Select OK in the popup that appears.
- Require a password when computers use PXE
- Password and Confirm password: pass@word1
- Respond to PXE requests on specific network interfaces: Select the yellow starburst and then enter the MAC address determined in the first step of this procedure. See the following example:
dir /b C:\RemoteInstall\SMSBoot\x64 abortpxe.com bootmgfw.efi bootmgr.exe pxeboot.com pxeboot.n12 wdsmgfw.efi wdsnbp.com Note If these files aren't present in the C:\RemoteInstall directory, verify that the REMINST share is configured as C:\RemoteInstall. You can view the properties of this share by typing net.exe share REMINST at a command prompt. If the share path is set to a different value, then replace C:\RemoteInstall with your REMINST share path. You can also enter the following command at an elevated Windows PowerShell prompt to open CMTrace. In the tool, select File, select Open, and then open the distmgr.log file. If errors are present, they will be highlighted in red:
"C:\Program Files\Microsoft Configuration Manager\tools\cmtrace.exe" The log file is updated continuously while Configuration Manager is running. Wait for Configuration Manager to repair any issues that are present, and periodically recheck that the files are present in the REMINST share location. Close CMTrace when done. You'll see the following line in distmgr.log that indicates the REMINST share is being populated with necessary files: Running: WDSUTIL.exe /Initialize-Server /REMINST:"C:\RemoteInstall" Once the files are present in the REMINST share location, you can close the CMTrace tool.
Create a branding image file
- If you have a bitmap (.BMP) image for suitable use as a branding image, copy it to the C:\Sources\OSD\Branding folder on SRV1. Otherwise, use the following step to copy a branding image.
- Enter the following command at an elevated Windows PowerShell prompt:
Copy-Item -Path "C:\ProgramData\Microsoft\User Account Pictures\user.bmp" -Destination "C:\Sources\OSD\Branding\contoso.bmp" Create a boot image for Configuration Manager
- In the Configuration Manager console, in the Software Library workspace, expand Operating Systems, right-click Boot Images, and then select Create Boot Image using MDT.
- On the Package Source page, under Package source folder to be created (UNC Path):, enter \\SRV1\Sources$\OSD\Boot\Zero Touch WinPE x64, and then select Next.
- The Zero Touch WinPE x64 folder doesn't yet exist. The folder will be created later.
- On the General Settings page, enter Zero Touch WinPE x64 next to Name, and select Next.
- On the Options page, under Platform choose x64, and select Next.
- On the Components page, in addition to the default selection of Microsoft Data Access Components (MDAC/ADO) support, select the Microsoft Diagnostics and Recovery Toolkit (DaRT) checkbox, and select Next.
- On the Customization page, select the Use a custom background bitmap file checkbox, and under UNC path, enter or browse to \\SRV1\Sources$\OSD\Branding\contoso.bmp, and then select Next twice. It will take a few minutes to generate the boot image.
- Select Finish.
- In the console display pane, right-click the Zero Touch WinPE x64 boot image, and then select Distribute Content.
- In the Distribute Content Wizard, select Next, select Add and select Distribution Point, select the SRV1.CONTOSO.COM checkbox, select OK, select Next twice, and then select Close.
- Use the CMTrace application to view the distmgr.log file again and verify that the boot image has been distributed. To open CMTrace, enter the following command at an elevated Windows PowerShell prompt on SRV1:
Invoke-Item 'C:\Program Files\Microsoft Configuration Manager\tools\cmtrace.exe' STATMSG: SEV=I LEV=M SOURCE="SMS Server" COMP="SMS_DISTRIBUTION_MANAGER" SYS=SRV1.CONTOSO.COM SITE=PS1 PID=924 TID=1424 GMTDATE=Tue Oct 09 22:36:30.986 2018 ISTR0="Zero Touch WinPE x64" ISTR1="PS10000A" ISTR2="" ISTR3="" ISTR4="" ISTR5="" ISTR6="" ISTR7="" ISTR8="" ISTR9="" NUMATTRS=1 AID0=400 AVAL0="PS10000A" SMS_DISTRIBUTION_MANAGER 10/9/2018 3:36:30 PM 1424 (0x0590) dir /s /b C:\RemoteInstall\SMSImages C:\RemoteInstall\SMSImages\PS100004 C:\RemoteInstall\SMSImages\PS100005 C:\RemoteInstall\SMSImages\PS100006 C:\RemoteInstall\SMSImages\PS100004\boot.PS100004.wim C:\RemoteInstall\SMSImages\PS100005\boot.PS100005.wim C:\RemoteInstall\SMSImages\PS100006\WinPE.PS100006.wim Note The first two images ( *.wim files) are default boot images. The third is the new boot image with DaRT.
Create a Windows 10 reference image
If you've already completed steps in Deploy Windows 10 in a test lab using Microsoft Deployment Toolkit then you've already created a Windows 10 reference image. In this case, skip to the next procedure in this guide: Add a Windows 10 OS image. If you've not yet created a Windows 10 reference image, complete the steps in this section.
-
In Step by step guide: Deploy Windows 10 in a test lab the Windows 10 Enterprise .iso file was saved to the c:\VHD directory as c:\VHD\w10-enterprise.iso. The first step in creating a deployment share is to mount this file on SRV1. To mount the Windows 10 Enterprise DVD on SRV1, open an elevated Windows PowerShell prompt on the Hyper-V host computer and enter the following command:
Set-VMDvdDrive -VMName SRV1 -Path c:\VHD\w10-enterprise.iso - Deployment share path: C:\MDTBuildLab
- Share name: MDTBuildLab$
- Deployment share description: MDT build lab
- Options: Select Next to accept the default
- Summary: Select Next
- Progress: settings will be applied
- Confirmation: Select Finish
- OS Type: Full set of source files
- Source: D:\
- Destination: W10Ent_x64
- Summary: Select Next
- Confirmation: Select Finish
- Task sequence ID: REFW10X64-001
- Task sequence name: Windows 10 Enterprise x64 Default Image
- Task sequence comments: Reference Build
- Template: Standard Client Task Sequence
- Select OS: Select Windows 10 Enterprise Evaluation in W10Ent_x64 install.wim
- Specify Product Key: Do not specify a product key at this time
- Full Name: Contoso
- Organization: Contoso
- Internet Explorer home page: http://www.contoso.com
- Admin Password: Do not specify an Administrator password at this time
- Summary: Select Next
- Confirmation: Select Finish
Note Since we aren't installing applications in this test lab, there's no need to enable the Windows Update Pre-Application Installation step. However, you should enable this step if you're also installing applications.
[Settings] Priority=Default [Default] _SMSTSORGNAME=Contoso UserDataLocation=NONE DoCapture=YES OSInstall=Y AdminPassword=pass@word1 TimeZoneName=Pacific Standard TimeZoneName OSDComputername=#Left("PC-%SerialNumber%",7)# JoinWorkgroup=WORKGROUP HideShell=YES FinishAction=SHUTDOWN DoNotCreateExtraPartition=YES ApplyGPOPack=NO SkipAdminPassword=YES SkipProductKey=YES SkipComputerName=YES SkipDomainMembership=YES SkipUserData=YES SkipLocaleSelection=YES SkipTaskSequence=NO SkipTimeZone=YES SkipApplications=YES SkipBitLocker=YES SkipSummary=YES SkipRoles=YES SkipCapture=NO SkipFinalSummary=NO [Settings] Priority=Default [Default] DeployRoot=\\SRV1\MDTBuildLab$ UserDomain=CONTOSO UserID=MDT_BA UserPassword=pass@word1 SkipBDDWelcome=YES Tip To copy the file, right-click the LiteTouchPE_x86.iso file, and select Copy on SRV1. Then open the c:\VHD folder on the Hyper-V host, right-click inside the folder, and select Paste.
New-VM -Name REFW10X64-001 -SwitchName poc-internal -NewVHDPath "c:\VHD\REFW10X64-001.vhdx" -NewVHDSizeBytes 60GB Set-VMMemory -VMName REFW10X64-001 -DynamicMemoryEnabled $true -MinimumBytes 1024MB -MaximumBytes 1024MB -Buffer 20 Set-VMDvdDrive -VMName REFW10X64-001 -Path c:\VHD\LiteTouchPE_x86.iso Start-VM REFW10X64-001 vmconnect localhost REFW10X64-001 - Install the Windows 10 Enterprise OS.
- Install added applications, roles, and features.
- Update the OS using Windows Update (or WSUS if optionally specified).
- Stage Windows PE on the local disk.
- Run System Preparation (Sysprep) and reboot into Windows PE.
- Capture the installation to a Windows Imaging (WIM) file.
- Turn off the virtual machine.
This step requires from 30 minutes to 2 hours, depending on the speed of the Hyper-V host and your network's download speed. After some time, you'll have a Windows 10 Enterprise x64 image that is fully patched and has run through Sysprep. The image is located in the C:\MDTBuildLab\Captures folder on SRV1. The file name is REFW10X64-001.wim.
Add a Windows 10 OS image
- Enter the following commands at an elevated Windows PowerShell prompt on SRV1:
New-Item -ItemType Directory -Path "C:\Sources\OSD\OS\Windows 10 Enterprise x64" cmd /c copy /z "C:\MDTBuildLab\Captures\REFW10X64-001.wim" "C:\Sources\OSD\OS\Windows 10 Enterprise x64" Create a task sequence
Complete this section slowly. There are a large number of similar settings from which to choose.
- In the Configuration Manager console, in the Software Library workspace expand Operating Systems, right-click Task Sequences, and then select Create MDT Task Sequence.
- On the Choose Template page, select the Client Task Sequence template and select Next.
- On the General page, enter Windows 10 Enterprise x64 under Task sequence name: and then select Next.
- On the Details page, enter the following settings:
- Join a domain: contoso.com
- Account: Select Set
- User name: contoso\CM_JD
- Password: pass@word1
- Confirm password: pass@word1
- Select OK
- Windows Settings
- User name: Contoso
- Organization name: Contoso
- Product key:
- Administrator Account: Enable the account and specify the local administrator password
- Password: pass@word1
- Confirm password: pass@word1
- Select Next
- On the Capture Settings page, accept the default settings and select Next.
- On the Boot Image page, browse and select the Zero Touch WinPE x64 boot image package, select OK, and then select Next.
- On the MDT Package page, select Create a new Microsoft Deployment Toolkit Files package, under Package source folder to be created (UNC Path):, enter \\SRV1\Sources$\OSD\MDT\MDT (MDT is repeated here, not a typo), and then select Next.
- On the MDT Details page, next to Name: enter MDT and then select Next.
- On the OS Image page, browse and select the Windows 10 Enterprise x64 package, select OK, and then select Next.
- On the Deployment Method page, accept the default settings for Zero Touch Installation and select Next.
- On the Client Package page, browse and select the Microsoft Corporation Configuration Manager Client package, select OK, and then select Next.
- On the USMT Package page, browse and select the Microsoft Corporation User State Migration Tool for Windows 10.0.14393.0 package, select OK, and then select Next.
- On the Settings Package page, select Create a new settings package, and under Package source folder to be created (UNC Path):, enter \\SRV1\Sources$\OSD\Settings\Windows 10 x64 Settings, and then select Next.
- On the Settings Details page, next to Name:, enter Windows 10 x64 Settings, and select Next.
- On the Sysprep Package page, select Next twice.
- On the Confirmation page, select Finish.
Edit the task sequence
- In the Configuration Manager console, in the Software Library workspace, select Task Sequences, right-click Windows 10 Enterprise x64, and then select Edit.
- Scroll down to the Install group and select the Set Variable for Drive Letter action.
- Change the Value under OSDPreserveDriveLetter from False to True, and then select Apply.
- In the State Restore group, select the Set Status 5 action, select Add in the upper left corner, point to User State, and select Request State Store. This action adds a new step immediately after Set Status 5.
- Configure this Request State Store step with the following settings:
- Request state storage location to: Restore state from another computer
- Select the If computer account fails to connect to state store, use the Network Access account checkbox.
- Options tab: Select the Continue on error checkbox.
- Add Condition: Task Sequence Variable:
- Variable: USMTLOCAL
- Condition: not equals
- Value: True
- Select OK
- Select Apply
- In the State Restore group, select Restore User State, select Add, point to User State, and select Release State Store.
- Configure this Release State Store step with the following settings:
- Options tab: Select the Continue on error checkbox.
- Add Condition: Task Sequence Variable:
- Variable: USMTLOCAL
- Condition: not equals
- Value: True
- Select OK
- Select OK
Finalize the OS configuration
If you completed all procedures in Deploy Windows 10 in a test lab using Microsoft Deployment Toolkit then the MDT deployment share is already present on SRV1. In this case, skip the first four steps below and begin with step 5 to edit CustomSettings.ini.
- In the MDT deployment workbench on SRV1, right-click Deployment Shares and then select New Deployment Share.
- Use the following settings for the New Deployment Share Wizard:
- Deployment share path: C:\MDTProduction
- Share name: MDTProduction$
- Deployment share description: MDT Production
- Options: Select Next to accept the default
- Summary: Select Next
- Progress: settings will be applied
- Confirmation: Select Finish
- Right-click the MDT Production deployment share, and select Properties.
- Select the Monitoring tab, select the Enable monitoring for this deployment share checkbox, and then select OK.
- Enter the following command at an elevated Windows PowerShell prompt on SRV1:
notepad.exe "C:\Sources\OSD\Settings\Windows 10 x64 Settings\CustomSettings.ini" [Settings] Priority=Default Properties=OSDMigrateConfigFiles,OSDMigrateMode [Default] DoCapture=NO ComputerBackupLocation=NONE OSDMigrateMode=Advanced OSDMigrateAdditionalCaptureOptions=/ue:*\* /ui:CONTOSO\* OSDMigrateConfigFiles=Miguser.xml,Migapp.xml SLSHARE=\\SRV1\Logs$ EventService=http://SRV1:9800 ApplyGPOPack=NO Note To migrate accounts other than those in the Contoso domain, then change the OSDMigrateAdditionalCaptureOptions option. For example, the following option will capture settings from all user accounts:
OSDMigrateAdditionalCaptureOptions=/all Create a deployment for the task sequence
- In the Software Library workspace, expand Operating Systems, select Task Sequences, right-click Windows 10 Enterprise x64, and then select Deploy.
- On the General page, next to Collection, select Browse, select the All Unknown Computers collection, select OK, and then select Next.
- On the Deployment Settings page, use the following settings:
- Purpose: Available
- Make available to the following clients: Only media and PXE
- Select Next.
- Select Next five times to accept defaults on the Scheduling, User Experience, Alerts, and Distribution Points pages.
- Select Close.
Deploy Windows 10 using PXE and Configuration Manager
In this first deployment scenario, you'll deploy Windows 10 using PXE. This scenario creates a new computer that doesn't have any migrated users or settings.
-
Enter the following commands at an elevated Windows PowerShell prompt on the Hyper-V host:
New-VM -Name "PC4" -NewVHDPath "c:\vhd\pc4.vhdx" -NewVHDSizeBytes 40GB -SwitchName poc-internal -BootDevice NetworkAdapter -Generation 2 Set-VMMemory -VMName "PC4" -DynamicMemoryEnabled $true -MinimumBytes 512MB -MaximumBytes 2048MB -Buffer 20 Start-VM PC4 vmconnect localhost PC4 - X:\Windows\temp\SMSTSLog\smsts.log before disks are formatted.
- X:\smstslog\smsts.log after disks are formatted.
- C:\_SMSTaskSequence\Logs\Smstslog\smsts.log before the Configuration Manager client is installed.
- C:\Windows\ccm\logs\Smstslog\smsts.log after the Configuration Manager client is installed.
- C:\Windows\ccm\logs\smsts.log when the task sequence is complete. Note: If a reboot is pending on the client, the reboot will be blocked as long as the command window is open.
- Install Windows 10
- Install the Configuration Manager client and hotfix
- Join the computer to the contoso.com domain
- Install any applications that were specified in the reference image
The following two procedures 1) Replace a client with Windows 10 and 2) Refresh a client with Windows 10 have been exchanged in their order in this guide compared to the previous version. This is to avoid having to restore Hyper-V checkpoints to have access to PC1 before the OS is upgraded. If this is your first time going through this guide, you won't notice any change, but if you have tried the guide previously then this change should make it simpler to complete.
Replace a client with Windows 10 using Configuration Manager
Before you start this section, you can delete computer objects from Active Directory that were created as part of previous deployment procedures. Use the Active Directory Users and Computers console on DC1 to remove stale entries under contoso.com\Computers, but do not delete the computer account (hostname) for PC1. There should be at least two computer accounts present in the contoso.com\Computers container: one for SRV1, and one for the hostname of PC1. It's not required to delete the stale entries, this action is only done to remove clutter.

In the replace procedure, PC1 won't be migrated to a new OS. It's simplest to perform this procedure before performing the refresh procedure. After you refresh PC1, the OS will be new. The next (replace) procedure doesn't install a new OS on PC1 but rather performs a side-by-side migration of PC1 and another computer (PC4), to copy users and settings from PC1 to the new computer.
Create a replace task sequence
- On SRV1, in the Configuration Manager console, in the Software Library workspace, expand Operating Systems, right-click Task Sequences, and then select Create MDT Task Sequence.
- On the Choose Template page, select Client Replace Task Sequence and select Next.
- On the General page, enter the following information:
- Task sequence name: Replace Task Sequence
- Task sequence comments: USMT backup only
- Select Next, and on the Boot Image page, browse and select the Zero Touch WinPE x64 boot image package. Select OK and then select Next to continue.
- On the MDT Package page, browse and select the MDT package. Select OK and then select Next to continue.
- On the USMT Package page, browse and select the Microsoft Corporation User State Migration Tool for Windows package. Select OK and then select Next to continue.
- On the Settings Package page, browse and select the Windows 10 x64 Settings package. Select OK and then select Next to continue.
- On the Summary page, review the details and then select Next.
- On the Confirmation page, select Finish.
If an error is displayed at this stage, it can be caused by a corrupt MDT integration. To repair it, close the Configuration Manager console, remove MDT integration, and then restore MDT integration.
Deploy PC4
Create a VM named PC4 to receive the applications and settings from PC1. This VM represents a new computer that will replace PC1. To create this VM, enter the following commands at an elevated Windows PowerShell prompt on the Hyper-V host:
New-VM -Name "PC4" -NewVHDPath "c:\vhd\pc4.vhdx" -NewVHDSizeBytes 60GB -SwitchName poc-internal -BootDevice NetworkAdapter -Generation 2 Set-VMMemory -VMName "PC4" -DynamicMemoryEnabled $true -MinimumBytes 1024MB -MaximumBytes 2048MB -Buffer 20 Set-VMNetworkAdapter -VMName PC4 -StaticMacAddress 00-15-5D-83-26-FF Hyper-V lets you define a static MAC address on PC4. In a real-world scenario, you must determine the MAC address of the new computer.
Install the Configuration Manager client on PC1
- Verify that the PC1 VM is running and in its original state, which was saved as a checkpoint and then restored in Deploy Windows 10 in a test lab using Microsoft Deployment Toolkit.
- If you haven't already saved a checkpoint for PC1, then do it now. Enter the following commands at an elevated Windows PowerShell prompt on the Hyper-V host:
Checkpoint-VM -Name PC1 -SnapshotName BeginState Tip If you don't see the computer account for PC1, select Refresh in the upper right corner of the console.
Note This command requires an elevated command prompt, not an elevated Windows PowerShell prompt.sc.exe stop ccmsetup "\\SRV1\c$\Program Files\Microsoft Configuration Manager\Client\CCMSetup.exe" /Uninstall Note If PC1 still has Configuration Manager registry settings that were applied by Group Policy, startup scripts, or other policies in its previous domain, these might not all be removed by CCMSetup /Uninstall and can cause problems with installation or registration of the client in its new environment. It might be necessary to manually remove these settings if they are present. For more information, see Manual removal of the Configuration Manager client.
net.exe stop wuauserv net.exe stop BITS Verify that both services were stopped successfully, then enter the following command at an elevated command prompt:
del "%ALLUSERSPROFILE%\Application Data\Microsoft\Network\Downloader\qmgr*.dat" net.exe start BITS bitsadmin.exe /list /allusers "\\SRV1\c$\Program Files\Microsoft Configuration Manager\Client\CCMSetup.exe" /mp:SRV1.contoso.com /logon SMSSITECODE=PS1 Get-Content -Path c:\windows\ccmsetup\logs\ccmsetup.log -Wait control.exe smscfgrc  If the client isn't able to find the PS1 site, review any error messages that are displayed in C:\Windows\CCM\Logs\ClientIDManagerStartup.log and LocationServices.log. A common reason the client can't locate the site code is because a previous configuration exists. For example, if a previous site code is configured at HKLM\SOFTWARE\Microsoft\SMS\Mobile Client\GPRequestedSiteAssignmentCode, delete or update this entry.
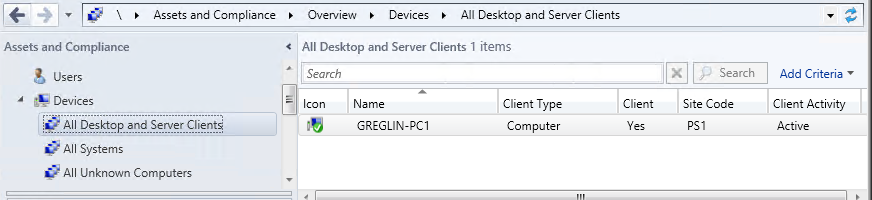
Note It might take several minutes for the client to fully register with the site and complete a client check. When it's complete you will see a green check mark over the client icon as shown above. To refresh the client, select it and then press F5 or right-click the client and select Refresh.
Create a device collection and deployment
- On SRV1, in the Configuration Manager console, in the Assets and Compliance workspace, right-click Device Collections and then select Create Device Collection.
- Use the following settings in the Create Device Collection Wizard:
- General > Name: Install Windows 10 Enterprise x64
- General > Limiting collection: All Systems
- Membership Rules > Add Rule: Direct Rule
- The Create Direct Membership Rule Wizard opens, select Next
- Search for Resources > Resource class: System Resource
- Search for Resources > Attribute name: Name
- Search for Resources > Value: %
- Select Resources > Value: Select the computername associated with the PC1 VM
- Select Next twice and then select Close in both windows (Next, Next, Close, then Next, Next, Close)
- Double-click the Install Windows 10 Enterprise x64 device collection and verify that the PC1 computer account is displayed.
- In the Software Library workspace, expand Operating Systems, select Task Sequences, right-click Windows 10 Enterprise x64 and then select Deploy.
- Use the following settings in the Deploy Software wizard:
- General > Collection: Select Browse and select Install Windows 10 Enterprise x64
- Deployment Settings > Purpose: Available
- Deployment Settings > Make available to the following clients: Configuration Manager clients, media and PXE
- Scheduling > select Next
- User Experience > select Next
- Alerts > select Next
- Distribution Points > select Next
- Summary > select Next
- Verify that the wizard completed successfully and then select Close
Associate PC4 with PC1
- On SRV1 in the Configuration Manager console, in the Assets and Compliance workspace, right-click Devices and then select Import Computer Information.
- On the Select Source page, choose Import single computer and select Next.
- On the Single Computer page, use the following settings:
- Computer Name: PC4
- MAC Address: 00:15:5D:83:26:FF
- Source Computer: Search twice, select the hostname, and select OK>
- Select Next, and on the User Accounts page choose Capture and restore specified user accounts, then select the yellow starburst next to User accounts to migrate.
- Select Browse and then under Enter the object name to select enter user1 and select OK twice.
- Select the yellow starburst again and repeat the previous step to add the contoso\administrator account.
- Select Next twice, and on the Choose Target Collection page, choose Add computers to the following collection, select Browse, choose Install Windows 10 Enterprise x64, select OK, select Next twice, and then select Close.
- In the Assets and Compliance workspace, select User State Migration and review the computer association in the display pane. The source computer will be the computername of PC1 (GREGLIN-PC1 in this example), the destination computer will be PC4, and the migration enter will be side-by-side.
- Right-click the association in the display pane and then select Specify User Accounts. You can add or remove user account here. Select OK.
- Right-click the association in the display pane and then select View Recovery Information. You'll see that a recovery key has been assigned, but a user state store location hasn't. Select Close.
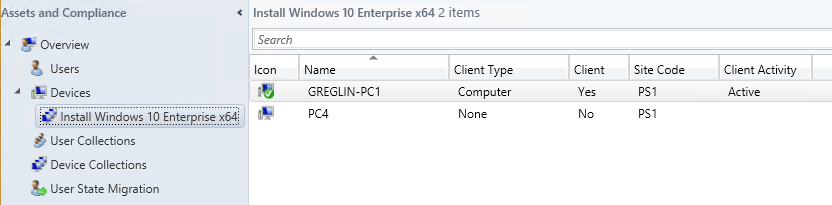
- Select Device Collections and then double-click Install Windows 10 Enterprise x64. Verify that PC4 is displayed in the collection. You might have to update and refresh the collection, or wait a few minutes, but don't proceed until PC4 is available. See the following example:
Create a device collection for PC1
- On SRV1, in the Configuration Manager console, in the Assets and Compliance workspace, right-click Device Collections and then select Create Device Collection.
- Use the following settings in the Create Device Collection Wizard:
- General > Name: USMT Backup (Replace)
- General > Limiting collection: All Systems
- Membership Rules > Add Rule: Direct Rule
- The Create Direct Membership Rule Wizard opens, select Next
- Search for Resources > Resource class: System Resource
- Search for Resources > Attribute name: Name
- Search for Resources > Value: %
- Select Resources > Value: Select the computername associated with the PC1 VM (GREGLIN-PC1 in this example).
- Select Next twice and then select Close in both windows.
- Select Device Collections and then double-click USMT Backup (Replace). Verify that the computer name/hostname associated with PC1 is displayed in the collection. Don't proceed until this name is displayed.
Create a new deployment
In the Configuration Manager console, in the Software Library workspace, under Operating Systems, select Task Sequences, right-click Replace Task Sequence, select Deploy, and use the following settings:
- General > Collection: USMT Backup (Replace)
- Deployment Settings > Purpose: Available
- Deployment Settings > Make available to the following clients: Only Configuration Manager Clients
- Scheduling: Select Next
- User Experience: Select Next
- Alerts: Select Next
- Distribution Points: Select Next
- Select Next and then select Close.
Verify the backup
- On PC1, open the Configuration Manager control panel applet by typing the following command in a command prompt:
control.exe smscfgrc C:\Windows\CCM\SCClient.exe 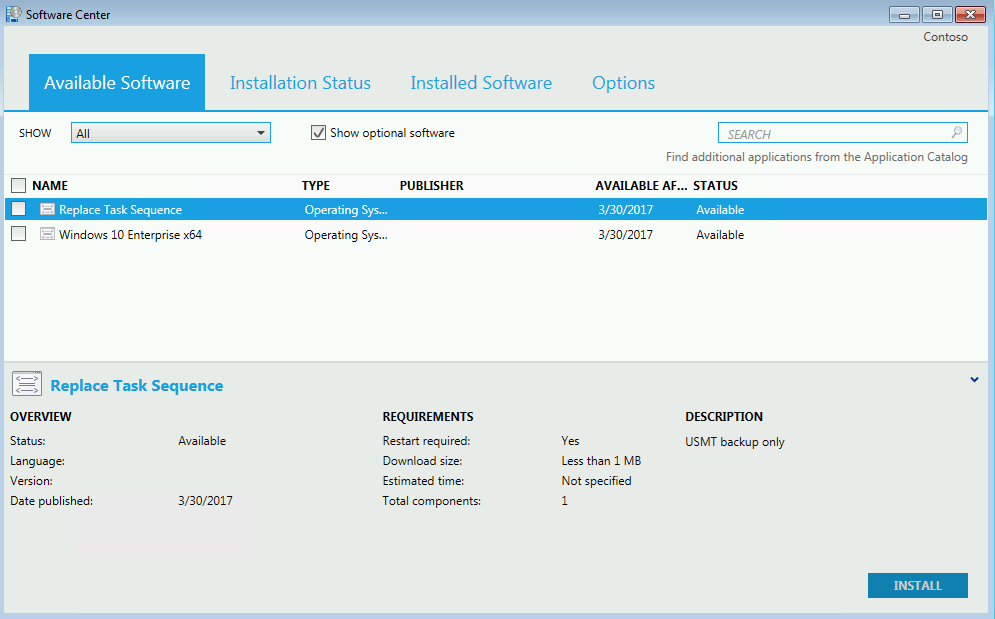
In Software Center, select Available Software, and then select the Replace Task Sequence checkbox. See the following example:
Note If you don't see any available software, try running step #2 again to start the Machine Policy Retrieval & Evaluation Cycle. You should see an alert that new software is available.
Deploy the new computer
- Start PC4 and press ENTER for a network boot when prompted. To start PC4, enter the following commands at an elevated Windows PowerShell prompt on the Hyper-V host:
Start-VM PC4 vmconnect localhost PC4 Note The next procedure will install a new OS on PC1, and update its status in Configuration Manager and in Active Directory as a Windows 10 device. So you can't return to a previous checkpoint only on the PC1 VM without a conflict. Therefore, if you do create a checkpoint, you should do this action for all VMs.
To save a checkpoint for all VMs, enter the following commands at an elevated Windows PowerShell prompt on the Hyper-V host:
Checkpoint-VM -Name DC1 -SnapshotName cm-refresh Checkpoint-VM -Name SRV1 -SnapshotName cm-refresh Checkpoint-VM -Name PC1 -SnapshotName cm-refresh Refresh a client with Windows 10 using Configuration Manager
Initiate the computer refresh
- On SRV1, in the Assets and Compliance workspace, select Device Collections and then double-click Install Windows 10 Enterprise x64.
- Right-click the computer account for PC1, point to Client Notification, select Download Computer Policy, and select OK in the popup dialog box.
- On PC1, in the notification area, select New software is available and then select Open Software Center.
- In the Software Center, select Operating Systems, select Windows 10 Enterprise x64, select Install and then select INSTALL OPERATING SYSTEM. See the following example:
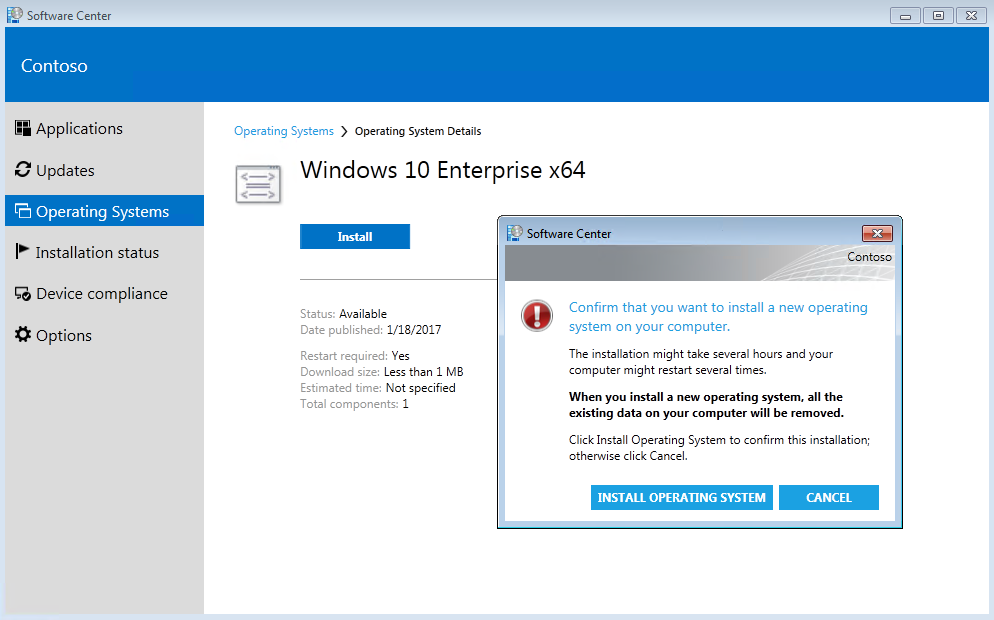 The computer will restart several times during the installation process. Installation includes downloading updates, reinstalling the Configuration Manager Client Agent, and restoring the user state. You can view status of the installation in the Configuration Manager console by accessing the Monitoring workspace, clicking Deployments, and then double-clicking the deployment associated with the Install Windows 10 Enterprise x64 collection. Under Asset Details, right-click the device and then select More Details. Select the Status tab to see a list of tasks that have been performed. See the following example:
 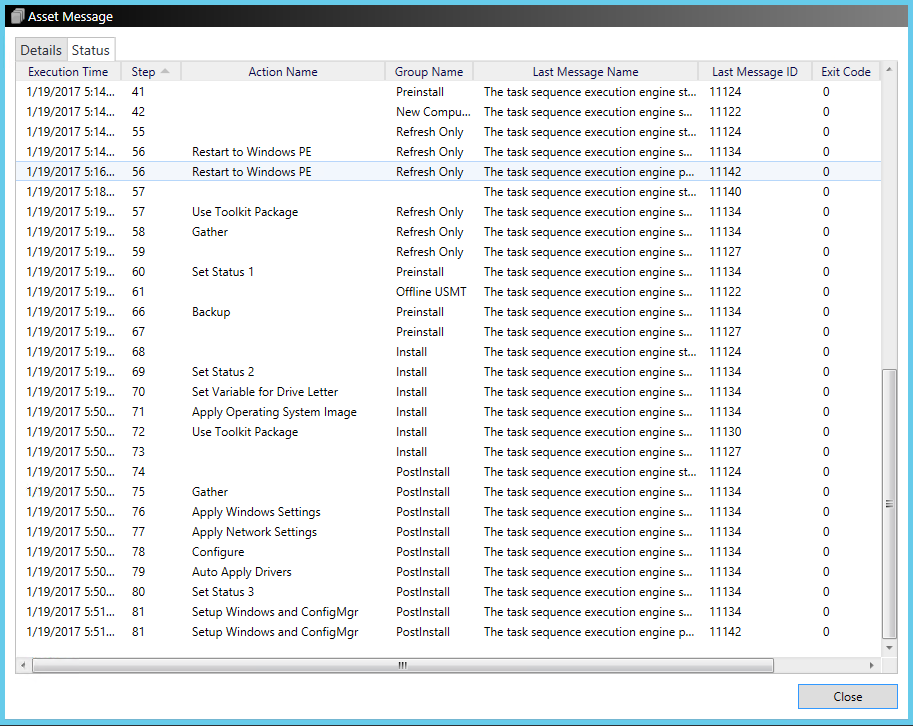 You can also monitor progress of the installation by using the MDT deployment workbench and viewing the Monitoring node under Deployment Shares\MDT Production. When installation has completed, sign in using the contoso\administrator account or the contoso\user1 account and verify that applications and settings have been successfully backed up and restored to your new Windows 10 Enterprise OS.